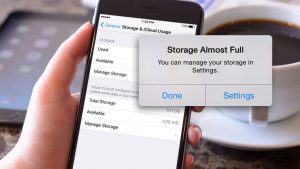
In the present-day screenshot become the most important feature in every device. To save pictures everyone is going to use the screenshot method instead of downloading pictures. Taking screenshots is simple and complete capturing pictures within seconds by entering commands.
Taking a screenshot in mac will become easier when compared with windows by knowing about shortcuts and command that helps to take screenshot successfully. Apple mac book doesn’t prove a feature to capture images in the form of a screenshot, but by using various keys as a command users can take the screenshot. We can see different apps which are specially designed to take screenshots on iPhone successfully. Screenshot can be considered a feature and tool in a mac.
In this article, we are going to help in find outing the keys and commands which help in taking screenshots. Sometimes there is no option to download images, in that time screenshots play a key role to capture them. screenshot tool helps in making an image of payments, transactions, work related to your profession, images, and many more.
Different ways to take a screenshot on mac
We can take a screenshot in mac by combining different keys in various manners. In screenshots also have different methods and variations, based on the user’s needs the screenshot process will be done. The different types of screenshots on a mac are,
1. How to capture a screenshot on a mac
To take a screenshot in mac need only 2 seconds. By following simple commands users can take a screenshot, the steps involved in capturing the screenshot is,
To take a screenshot select the image, press the commands, shift + command + 3, finally screen is captured and users can see it on the top left corner of the screen. After capturing a screenshot that will appear in images or galleries in the form of a folder with the name of the screenshot.

2. How to screen capture a section of a screen.
Taking a screenshot and capturing a section of a screen will be done with the help of the same tool, but there is a slight difference when compared with each other. In screenshot users can capture the entire screen and capturing a section of a screen is helpful to capture the selected part in a screen with the help of the crosshair option.
To capture a section of a screen or image press the commands like shift + command + 4, while giving commands try to type all commands at a time, if there are variations in giving commands then we can’t capture the portion of the image.
Type shift + command + 4 and draw the part that needs to capture with the help of crosshair, by simply dragging a crosshair and giving a click on the mouse can leads to capture the image successfully.

3. How to take a screenshot of window (menu) on a mac.
To take a screenshot and section screenshot need only 2 commands, but capturing a screenshot in windows needs four commands.
To capture window or menu need to open which is required and ready to take a screenshot and enter and hold the shift + command + 4 + spacebar keys, and you can see the changing of the pointer into the camera, finally select the window option to complete taking window or menu screenshot on mac. Finally, the image is saved into the device with the name of the screenshot folder.

4. Using grab to capture a screenshot
Grab app helps to take a screenshot in mac if the user doesn’t like to give commands, and in case if they don’t know about commands. Grab is a simple application which only facilitates capturing screenshots on mac books. Grab application helps in capturing images straightforwardly at a movement.
Open the finder option in the grab application and select the application which is included in a list, and the list is located on the top left side of the screen. And then give a double click on utilities option to select the image and take capture menu system help to grab image successfully.
If users using the latest version of the apple system or macOS Catalina, the grab application is disabled, so they need to capture an image by giving commands like command + shift + 5 keys at a single time.
Where do the screenshot images store?
There is no need to save screenshot images separately, after taking a screenshot it automatically saves in the device, and by default, the separate fouler is also available on the desktop with the title f screenshot. If a user wants to change the image to another folder, it will be done by following a simple method.
Conclusion
Screenshots have become the most powerful and important tool in now a day, knowing and gaining knowledge about screen capturing and portion capturing and its commands is necessary. In this article, we explain the commands that are helpful to capture images in the form of screenshots.


